You've got a 2D floor plan - maybe from AutoCAD, SketchUp, or even a hand-drawn sketch scanned as an image. Traditionally, turning that into a photorealistic visualization would mean hours in V-Ray, Lumion, or Enscape. But what if you could do it in about a minute?
That's exactly what EazyRender does. Our users regularly upload flat 2D floor plans and get stunning top-down photorealistic renders with realistic materials, lighting, shadows, and furniture - all generated by AI.
Why Render Floor Plans?
Floor plans are the universal language of architecture and interior design. But flat, black-and-white drawings don't excite clients. A photorealistic render of the same floor plan instantly communicates:
- Material choices - hardwood vs. tile, concrete vs. marble
- Spatial feeling - how open or cozy a space will feel
- Lighting quality - natural light flow, shadow patterns
- Furniture layout - how everything fits together in context
Pro tip
How It Works with EazyRender
Export or screenshot your floor plan
From AutoCAD, SketchUp, Revit, or any software - just export as PNG/JPG or take a screenshot. Make sure the lines are clean and the image is high resolution.
Upload to EazyRender
Go to app.eazyrender.com, click upload, and drop your floor plan image. The AI will analyze the layout, walls, doors, and openings automatically.
Choose your style
Pick from styles like modern, Scandinavian, industrial, or minimalist. You can also type natural language instructions like "warm wood floors, white walls, modern furniture".
Get your render in about a minute
The AI generates a photorealistic interpretation of your floor plan with materials, lighting, shadows, and furnishings. You can generate multiple variations.
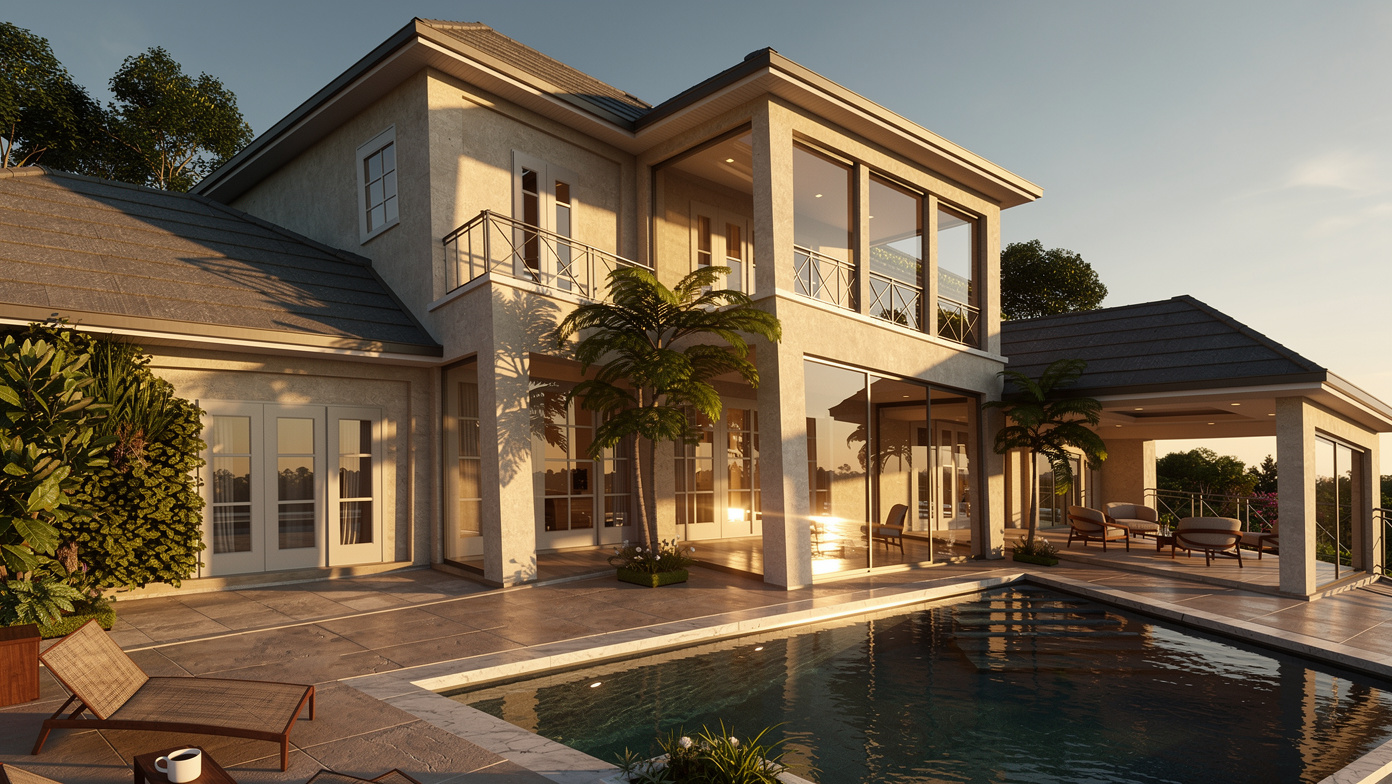
Real Example: Before & After
Here's a real example from one of our users. They uploaded a standard 2D architectural floor plan and got a stunning photorealistic top-down render:
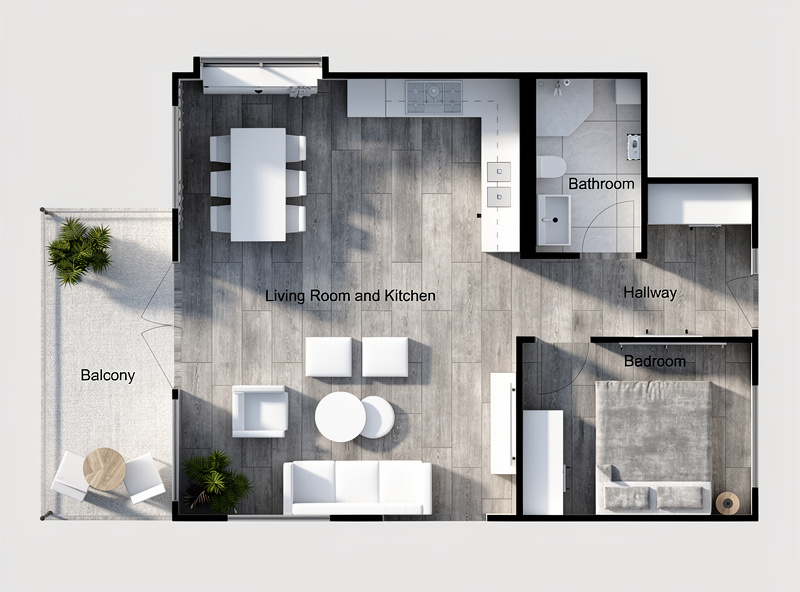
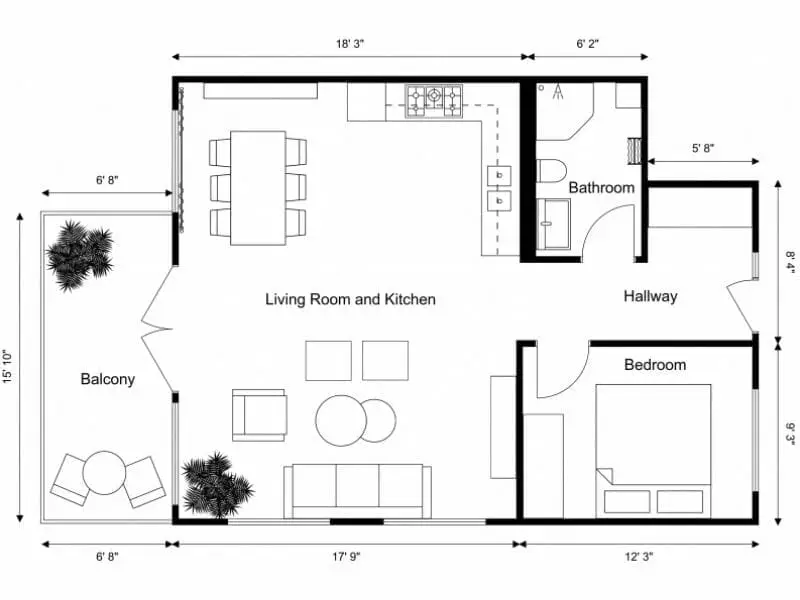
Notice how the AI understood the room boundaries, added appropriate materials to different areas, generated realistic furniture placement, and created natural-looking lighting with shadows coming through the windows.
Best Practices for Floor Plan Renders
Image Quality Matters
The higher resolution your floor plan image, the more detail the AI can work with. We recommend at least 1920px wide. Avoid blurry screenshots or low-resolution exports.
Keep It Clean
Remove dimension lines, annotations, and text labels if possible. The AI works best with clean architectural lines - walls, doors, windows, and basic furniture outlines.
Use the Style Prompt
Don't just pick a preset - add specific instructions. For example:
"Modern minimalist, oak hardwood floors, white marble kitchen counter, warm afternoon lighting, large indoor plants"
Multiple variations
Who Uses This Feature?
- Architecture students - Quick visualization for studio presentations without learning complex rendering software
- Interior designers - Show clients material and furniture options in context
- Real estate developers - Visualize units before construction for pre-sales
- Architects - Fast concept visualization during early design phases
Try It Yourself
Upload your floor plan, choose your style, and see the transformation for yourself. Paid packs start at $2 for 2 renders, and the whole process takes about a minute.