You're in SketchUp. You've got a model looking decent from a good angle. Normally, you'd spend the next 2 hours setting up V-Ray - materials, lights, camera settings, render settings, waiting, tweaking, re-rendering. Or you'd export to Lumion and go through another round of setup.
What if you could just screenshot your SketchUp viewport and get a photorealistic render in about a minute? That's exactly what hundreds of our users do every day.
The Simplest Workflow in Architecture
Get your SketchUp model to a decent angle
Navigate to the camera angle you want to render. Don't worry about materials or lighting - the AI handles that. Just focus on the geometry and composition.
Take a screenshot or export the view
Press PrtSc, use the Snipping Tool, or export as PNG from SketchUp. The key is getting a clean view with clear geometry.
Upload to EazyRender
Drop the image into EazyRender. The AI will analyze the geometry, identify surfaces, and understand the spatial context.
Add your style instructions
Type what you want: "modern interior, warm oak floors, white walls, afternoon sunlight through large windows, minimal furniture". Be as specific or vague as you like.
Render & iterate
Get your result in about a minute. Not quite right? Adjust the prompt and render again - it costs just one credit. Generate 5 variations faster than a single V-Ray render.
Why Screenshots Work So Well
You might think the AI needs a 3D model file to work properly. But screenshots are actually ideal for several reasons:
- Clean geometry - SketchUp's viewport shows clear edges and surfaces
- Perspective is built-in - the camera angle is already set
- Universal format - works from any SketchUp version, even SketchUp Free
- Fast iteration - change the angle, screenshot, render, repeat
SketchUp settings for best results
What Types of SketchUp Models Work Best?
Interior Scenes ★★★★★
Interior screenshots from SketchUp are perfect. The AI excels at adding realistic flooring, wall finishes, furniture details, and natural lighting. Living rooms, kitchens, bedrooms, offices - all produce stunning results.
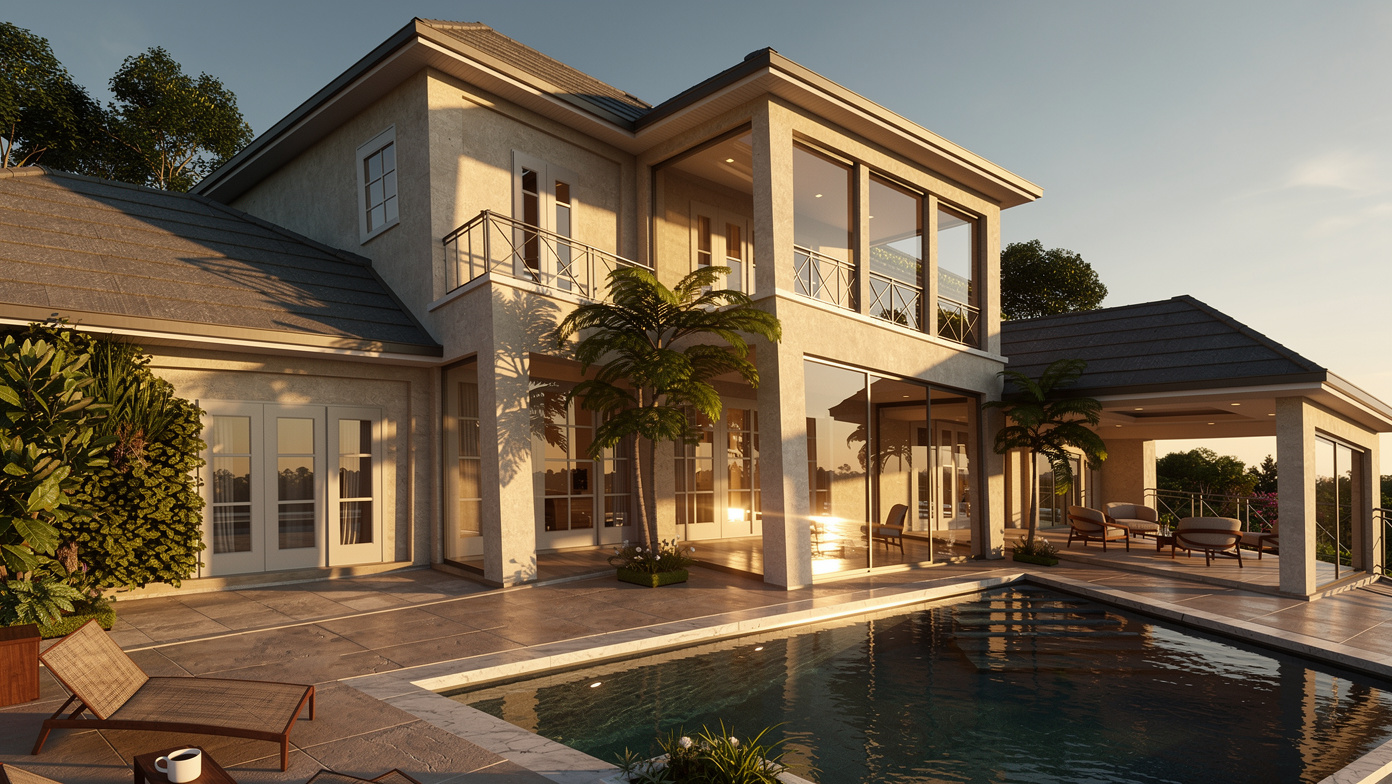
Exterior / Facade Views ★★★★★
Building exteriors work incredibly well. The AI adds realistic materials, landscaping, sky, and atmospheric effects. Even simple massing models can look impressive.
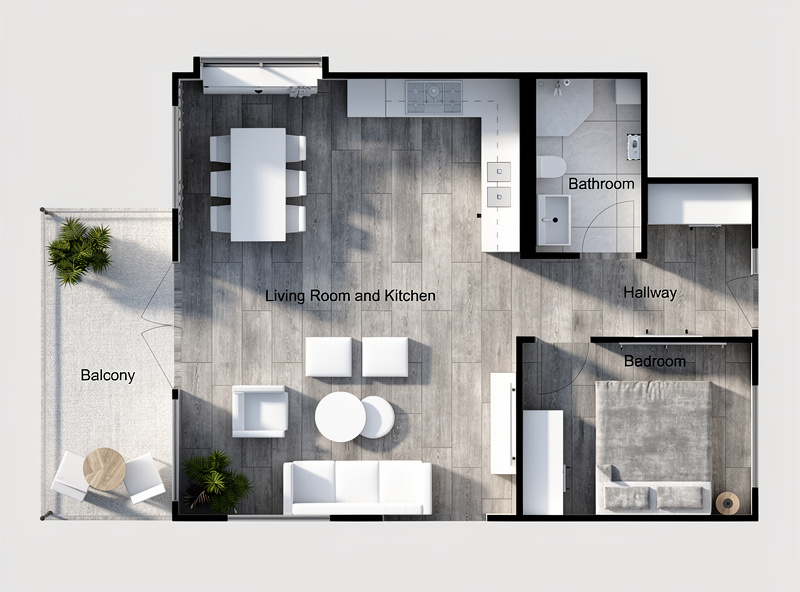
Bird's Eye / Floor Plans ★★★★☆
Top-down views of floor plans work great as well. The AI adds materials from above and creates a nice architectural visualization effect.
Detail / Close-up Views ★★★★☆
Furniture details, kitchen close-ups, bathroom fixtures - these work well when the geometry is clear and well-modeled.
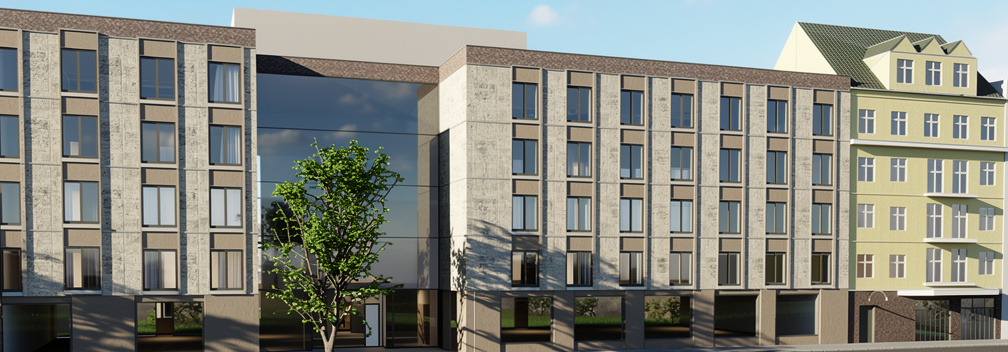
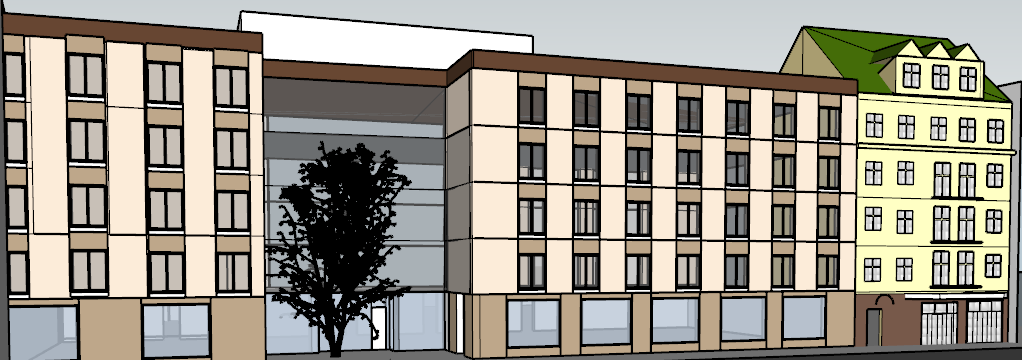
Real Example: Before & After
Here's a real result from one of our users. A basic SketchUp screenshot transformed into a photorealistic render in about a minute:
Magic Prompts for SketchUp Renders
Here are some prompts our SketchUp users love:
For interiors:
"Scandinavian interior, light wood floors, white walls, large windows with sheer curtains, warm afternoon golden hour lighting, minimal mid-century modern furniture, indoor plants"
For exteriors:
"Modern residential exterior, white concrete and wood cladding, landscaped garden, blue sky with soft clouds, golden hour lighting, architectural photography style"
For conceptual:
"Dramatic architectural render, moody lighting, concrete and glass materials, fog effect, cinematic atmosphere, award-winning architectural photography"
Any language works
But What About V-Ray for SketchUp?
V-Ray for SketchUp is an excellent tool - no question about it. But consider this workflow comparison:
V-Ray Workflow
- Set up V-Ray materials (20–60 min)
- Add V-Ray lights / HDRI (10–20 min)
- Configure camera & render settings (5–10 min)
- Test render at low quality (2–5 min)
- Adjust and re-render (10–30 min)
- Final render at high quality (15–120 min)
- Post-process in Photoshop (10–30 min)
Total: 1–4+ hours
EazyRender Workflow
- Screenshot your SketchUp model (5 sec)
- Upload to EazyRender (10 sec)
- Write your style prompt (30 sec)
- Get photorealistic render (~1 min)
- Optional: iterate with different prompts
Total: ~1 minute
Try It Right Now
Open SketchUp, navigate to any model, take a screenshot, and upload it to EazyRender. Paid packs start at $2 for 2 renders, and the whole process takes about a minute. No plugins to install, no settings to configure, no GPU required.